There are a multitude of articles and examples out there demonstrating how to create animations using matplotlib’s FuncAnimation library. That said, they tend to be both challenging to follow and more oriented towards plotting lines than tabular data. This series of articles will delve into the details of animating tabular data plots: the plan here is start at the very beginning and explain the process in detailed steps.
The examples here will be built with a Jupyter Notebook from Anaconda 3.7.4. Data Notebooks built on Jupyter are great for documenting data explorations including sharing plotting and animation visualizations.
As a preliminary, you will need matplotlib, numpy pandas and a video writer–the writer I used is ffmpeg and I installed this via the Anaconda shell using:
conda install -c conda-forge ffmpeg
Also, the version of matplotlib used here is 3.1.2. Below is the line of code to assist in checking this on your system.
print(plt.__version__)
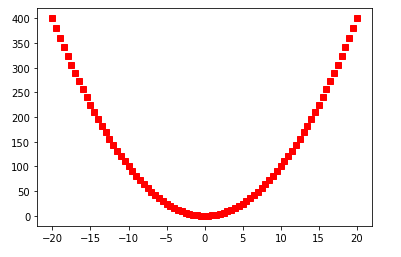
The first challenge of understanding the use of matplotlib is comprehending why some examples use pyplot and other axes (usually denoted as ax) objects. Suppose the aim is to draw a parabola. The first approach can be done with a few simple lines of code:
import numpy as np
import matplotlib.pyplot as plt
%matplotlib inline
#create the function: f(x) = y**2
x = np.arange(-20., 20.1, 0.5)
#draw the figure MATLAB-style with red squares
p = plt.plot(x, x**2, 'rs')
plt.xlabel("X")
plt.ylabel("Y")
plt.title("Example 1")
plt.show()
I think of such examples as being in the older MATLAB-style of procedural plotting. MATLAB was the inspiration for the original creator of the matplotlib library and is programmatically similar to the above code’s use of a single function to carry out all plotting tasks. In terms of implementation, this style hides the OO details. However, under the hood, the procedural style implicitly references objects and methods
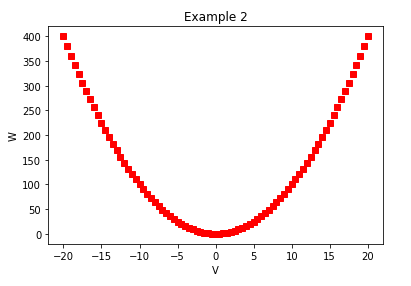
The Object-Oriented approach features direct calls to the methods of the underlying objects. The underlying objects being the Figure and the Axes. Roughly, an axes object refers to the the x-axis and y-axis, but also includes the other components of the graph. Thus, axes does not strictly-speaking refer to the plural of axis in this context. Drawing the same parabola with the OO code is demonstrated below.
v = np.arange(-20., 20.1, 0.5)
fig, ax = plt.subplots()
ax.set_xlabel('V')
ax.set_ylabel('W')
ax.set_title('Example 2')
ax.plot(v,v**2,'rs')
Adding Complexity
An advantage of using OO method calls is the plethora of nicely-organized customizations one can make to a graph. If a laundry-list of requirements has to be implemented:
- custom ticks
- colored grid
- text or annotations
- customized axis label with non-default font
The implementation is a simple matter of looking up the methods in the axes documentation. Below is an implementation.
x = np.arange(-20., 20.1, 0.5)
fig, ax = plt.subplots()
ax.set_xlabel('$\mathregular{x}$', fontsize=15, color='b')
ax.set_ylabel('$\mathregular{x^3}$',fontsize=15, color='b')
ax.set_title('Example 3')
#add a grid pattern
ax.grid(color='green', linestyle='--', linewidth=1)
#set the axis limits
ax.set_xlim([-10, 10])
ax.set_ylim([-1000, 1000])
#customize the x-ticks
ax.set_xticks([-10,-5, 0,5, 10])
#customize the y-ticks
ax.set_yticks([-1000,0,1000])
#add some text
ax.text(-5, 100, r"f(x) = $x^3$", color="r", fontsize=20)
ax.plot(x,x**3, lw=2)

Animating
When a static plot is not enough, Matplotlib provides simple animation tools via the animation module. In the code example below the FuncAnimation class is added to the previous hyperbola-generating code. There are some changes to the flow that are needed to implement the animation–these will be described in detail later. For now, it’s enough to appreciate the relative ease with which the examples above can be animated.
import numpy as np
import matplotlib.pyplot as plt
from matplotlib import animation
%matplotlib inline

#create a figure and axes
#fig = plt.figure(1,1)
#ax = plt.axes(xlim=(-10, 10), ylim=(-1000, 1000))
fig,ax = plt.subplots(1,1)
plt.close() #avoid a ghost plot
line, = ax.plot([], [], lw=3) #this returns a tuple

ax.set_xlabel('$\mathregular{x}$', fontsize=15, color='b')
ax.set_ylabel('$\mathregular{x^3}$',fontsize=15, color='b', labelpad=-10)
ax.set_title('Example 4')
#add a grid pattern
ax.grid(color='green', linestyle='--', linewidth=1)

#customize the x-ticks
ax.set_xticks([-10,-5, 0,5, 10])
#customize the y-ticks
ax.set_yticks([-1000,0,1000])
#add some text
ax.text(-5, 100, r"f(x) = $x^3$", color="r", fontsize=20)

#create the data - initially empty
xdata_l = []
ydata_l = []

def animate(n):
    '''
    produces a sequence of values when called sequentially
    '''
    xdata_l.append(n)
    ydata_l.append(n**3)
    line.set_xdata(xdata_l)
    line.set_ydata(ydata_l)
    return line,

def init():
    line.set_data([], [])
    return line,

#generator
def gen_function():
    '''
    Generate the values used for frame number
    '''
    for i in np.arange(-20,20.1,.5):
        yield i


#animate
anim = animation.FuncAnimation(fig, animate, init_func=init, frames=gen_function, interval=50)

#play this animation on Jupyterlab
from IPython.display import HTML
HTML(anim.to_html5_video())
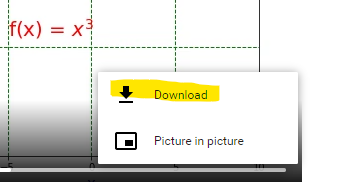
This produces the following video:
The resulting animation, in video form, can be downloaded from Jupyterlab simply by clicking on the three dots and choosing download.